Have you ever wondered why your hair feels lifeless despite using expensive shampoos? The answer might be hiding right on your scalp. Product buildup, excess oil, and dead skin cells create an invisible barrier that prevents your hair from thriving. A scalp detox at home, inspired by the viral Korean and Japanese head spa treatments, can transform your hair health without the hefty spa price tag.
In this guide, you’ll discover how to create a professional-quality head spa experience in your own bathroom. These five simple steps will help you deep-cleanse your scalp, stimulate hair growth, and achieve that salon-fresh feeling—all for a fraction of the cost. Whether you’re dealing with dandruff, oily roots, or thinning hair, this DIY scalp treatment addresses the root cause: an unhealthy scalp environment.
Why Your Scalp Needs a Detox Treatment
Your scalp is skin, just like your face, yet most people neglect it in their beauty routines. Every day, styling products, dry shampoo, natural oils, and environmental pollutants accumulate on your scalp. This buildup clogs hair follicles, disrupts your scalp’s pH balance, and can lead to inflammation.
According to research published in the International Journal of Trichology, scalp buildup significantly impacts hair health by restricting oxygen flow to follicles and preventing essential nutrients from reaching hair roots. Regular scalp exfoliation removes these barriers, creating an optimal environment for stronger, healthier hair growth.
A proper scalp detox offers multiple benefits beyond just cleanliness. It improves blood circulation to hair follicles, which delivers vital nutrients and oxygen. Enhanced circulation has been linked to increased hair thickness in studies conducted by dermatologists specializing in hair loss prevention. Additionally, detoxifying your scalp helps regulate oil production—solving both greasy roots and dry, flaky scalp conditions by restoring natural balance.
The Korean beauty philosophy treats scalp care with the same diligence as facial skincare. This “skinification” of the scalp recognizes that healthy hair starts at the roots, not with expensive hair products alone.
What You’ll Need for Your DIY Head Spa
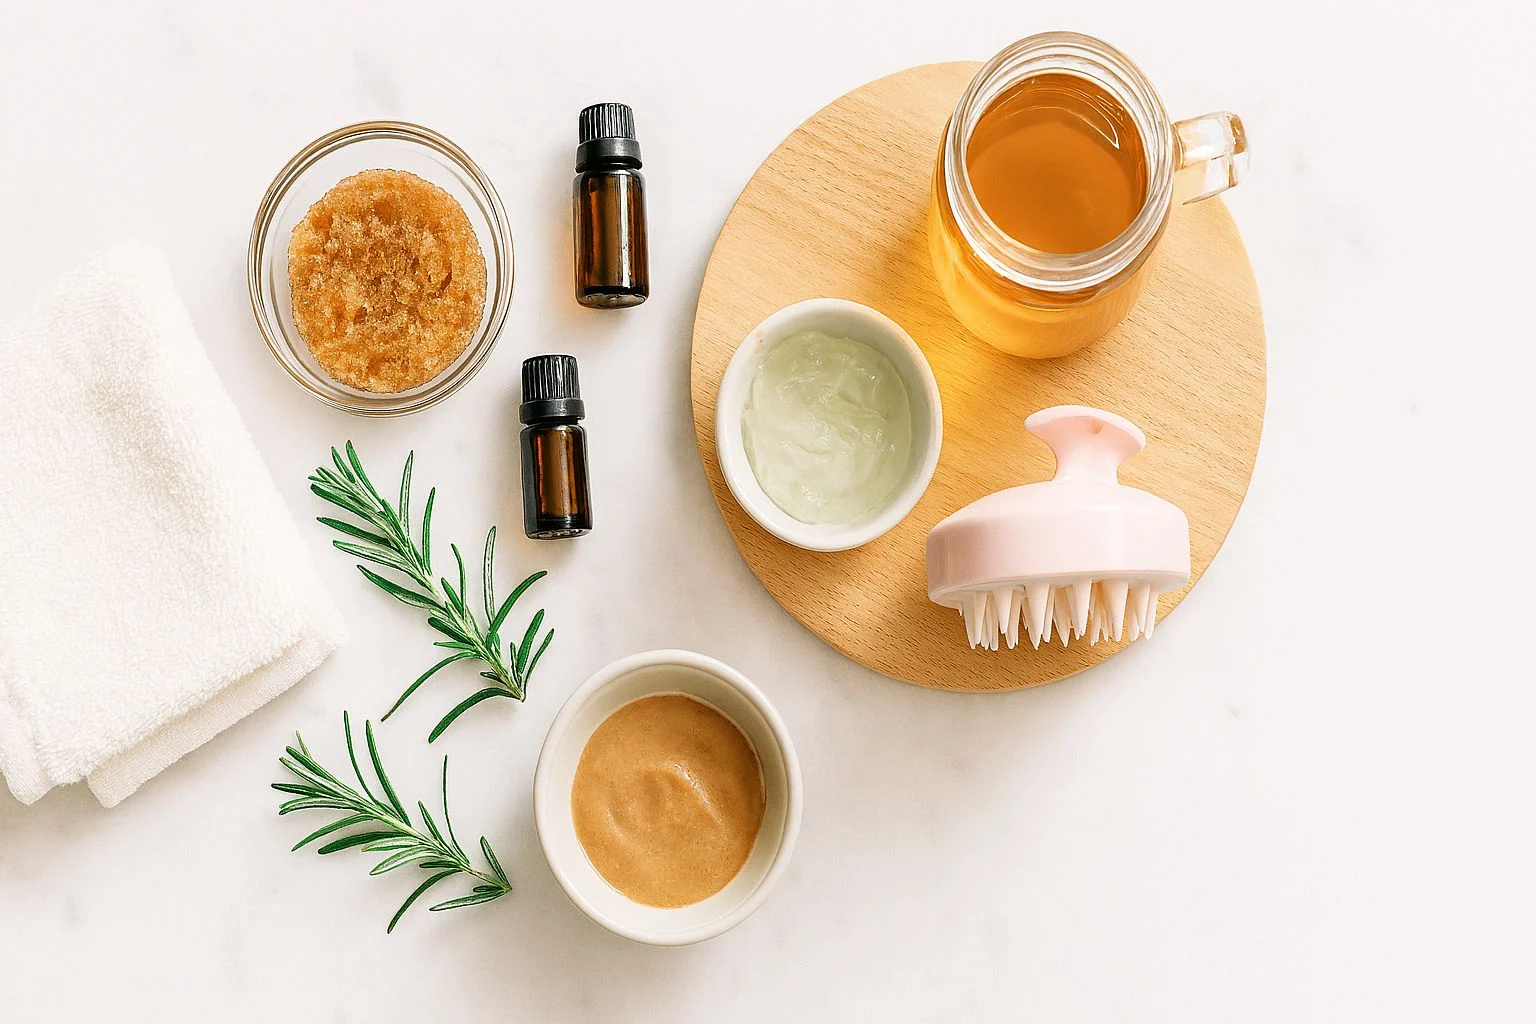
Creating a spa-quality scalp treatment at home requires just a few affordable ingredients and tools. Start with a gentle scalp scrub—you can purchase one or make your own using brown sugar and coconut oil. The exfoliating particles remove dead skin cells without causing micro-tears in your scalp.
You’ll also need a clarifying shampoo to thoroughly cleanse away buildup after exfoliation. Look for formulas containing salicylic acid or tea tree oil, both known for their deep-cleansing and anti-inflammatory properties. A scalp massage tool or brush enhances circulation during treatment—the silicone bristles stimulate blood flow without damaging delicate scalp tissue.
For the nourishing mask phase, gather ingredients like aloe vera gel, rosemary essential oil, and a lightweight carrier oil such as jojoba or grapeseed oil. These natural ingredients hydrate without leaving heavy residue. Finally, prepare a basin of cool water infused with apple cider vinegar for the final rinse—this balances your scalp’s pH and seals hair cuticles for added shine.
Optional but beneficial additions include a handheld steamer or warm towel for opening pores, and a microfiber towel that absorbs water without creating friction. Having everything prepared before you begin ensures a relaxing, uninterrupted experience.
Step 1: Analyze Your Scalp Condition
Before starting your detox treatment, assess your scalp’s current state. Part your hair in several sections and examine your scalp closely using a mirror in good lighting. Look for signs of dryness, such as white flakes or tight, itchy sensations. Conversely, check for excess oiliness—does your scalp feel greasy by midday, even after washing?
Notice any redness, bumps, or irritated areas that might indicate inflammation or sensitivity. Take note of your hair density at the crown and temples, as these areas often show thinning first. Understanding your scalp’s specific needs allows you to customize your treatment accordingly.
If you notice excessive oil production, you’ll want to focus on clarifying and oil-balancing ingredients like witch hazel or clay masks. For dry, sensitive scalps, prioritize hydrating ingredients such as hyaluronic acid serums or aloe-based treatments. Those experiencing hair thinning should incorporate circulation-boosting massage techniques and growth-stimulating ingredients like peppermint or rosemary oil.
This analysis phase mirrors the professional scalp scanning done in Korean head spas, where specialists use microscope technology to examine follicle health. While you won’t have specialized equipment at home, this visual assessment provides valuable insights for personalizing your treatment.
Step 2: Deep Cleanse with Scalp Exfoliation
Begin your treatment with dry hair. Apply your scalp scrub directly to your scalp in sections, focusing on areas where buildup tends to accumulate—typically around the hairline, crown, and behind the ears. Use gentle, circular motions with your fingertips or a scalp massage brush to work the scrub across your entire scalp.
Spend at least five minutes on this exfoliation phase. The mechanical action combined with exfoliating ingredients breaks down stubborn product residue and lifts dead skin cells. According to dermatologists at the American Academy of Dermatology, regular scalp exfoliation can reduce dandruff by up to 60% and improve the effectiveness of topical hair growth treatments.
As you massage, pay attention to how your scalp feels. You should experience a mild tingling sensation from increased blood flow, but never pain or burning. If you have a sensitive scalp, opt for gentler exfoliants like finely ground oatmeal instead of coarser sugars or salts.
After thoroughly exfoliating, rinse your hair with warm water. Follow immediately with your clarifying shampoo, massaging it into your scalp for two to three minutes. This double-cleansing method, borrowed from Korean skincare principles, ensures complete removal of buildup without stripping your scalp of necessary moisture.
The exfoliation step is crucial because clogged follicles cannot absorb the nourishing treatments that follow. Think of it as preparing soil before planting seeds—you’re creating the optimal environment for healthy hair growth.
Step 3: Stimulate with Therapeutic Massage
After rinsing out your clarifying shampoo, apply a few drops of rosemary or peppermint essential oil diluted in a carrier oil to your damp scalp. These oils are not merely aromatherapy—research published in Archives of Dermatology found that rosemary oil performed comparably to minoxidil (Rogaine) in promoting hair growth after six months of consistent use.
Now begins the most relaxing part of your DIY head spa: the scalp massage. Using your fingertips or a specialized massage tool, apply gentle pressure in circular motions across your entire scalp. Start at your temples and work toward the crown, then move from your forehead back to the nape of your neck.
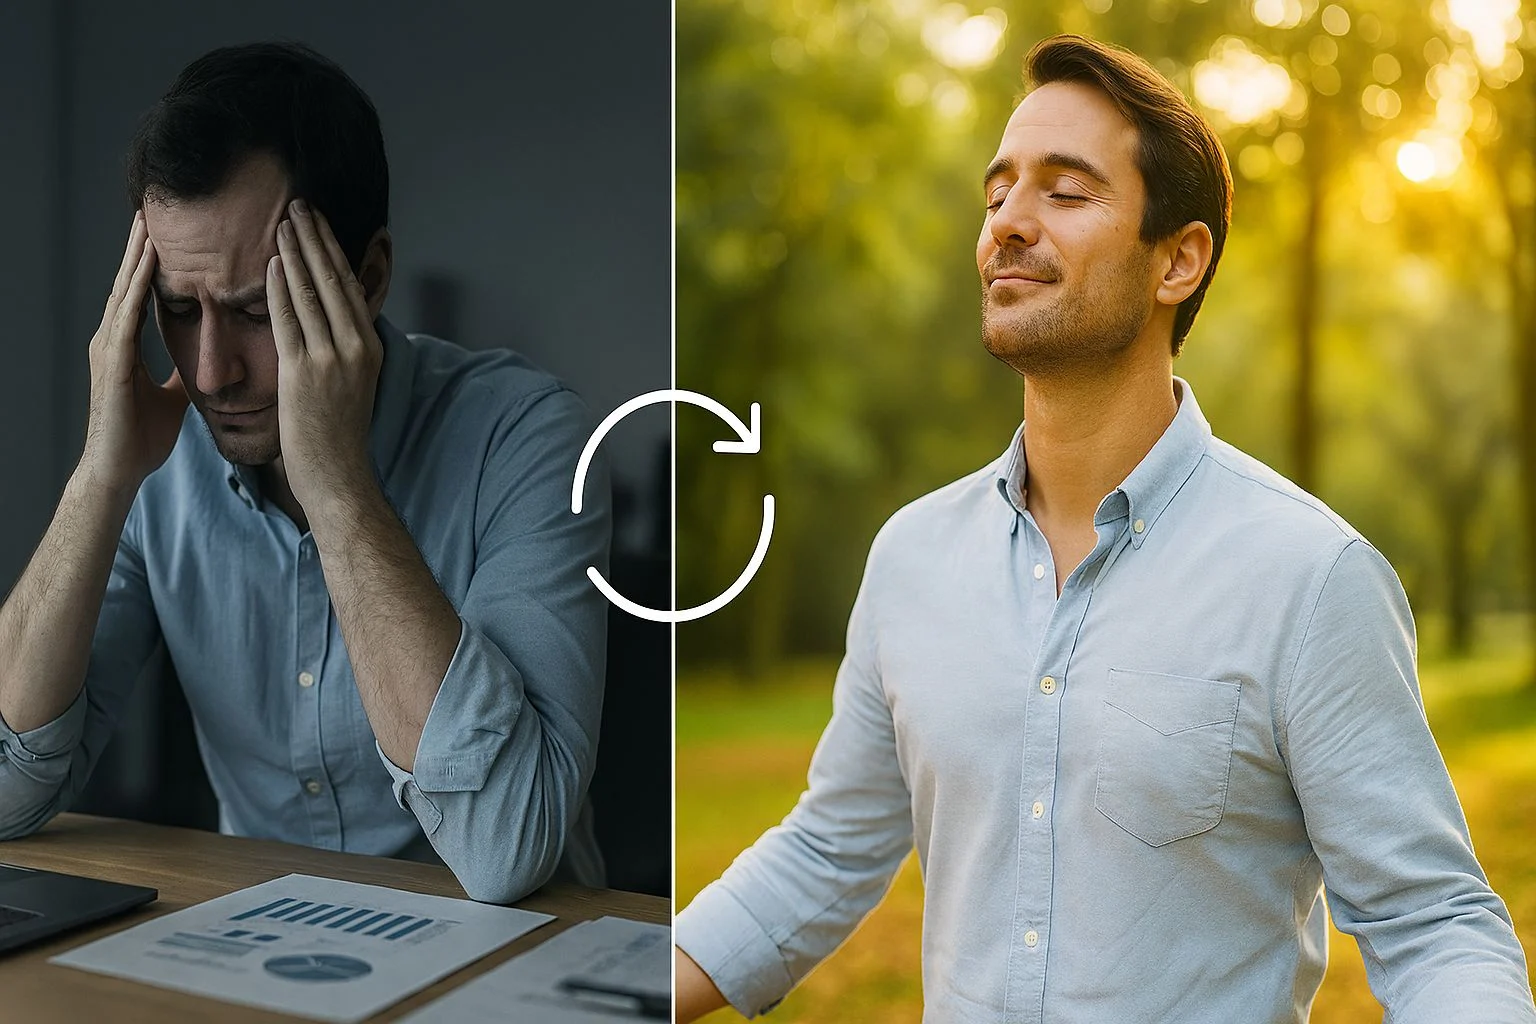
This massage technique, inspired by traditional Korean acupressure methods, serves multiple purposes. It increases blood circulation by up to 300%, according to studies on scalp stimulation therapy. Enhanced blood flow delivers oxygen and nutrients to hair follicles while removing waste products. The massage also provides stress relief—elevated cortisol levels have been linked to hair loss conditions like telogen effluvium.
Spend ten to fifteen minutes on this massage for maximum benefits. Focus extra attention on thinning areas, as these follicles need increased circulation most. The massage should feel pleasurable and relaxing, never painful. You’re essentially giving your scalp a workout, stimulating the tiny muscles around each follicle and encouraging them to enter the active growth phase.
Many people report feeling tension headaches dissipate during this step, as the massage releases built-up stress in the scalp muscles. This demonstrates the holistic wellness benefits of head spa treatments beyond just hair health.
Step 4: Nourish with a Customized Scalp Mask
While your scalp is warm and receptive from massage, apply a deeply nourishing mask tailored to your specific needs. For oily scalps, mix bentonite clay with apple cider vinegar to absorb excess sebum and balance pH levels. Those with dry, sensitive scalps benefit from a mask combining aloe vera gel, honey, and a few drops of lavender oil for its anti-inflammatory properties.
If hair growth is your primary concern, create a mask using Greek yogurt (rich in protein and probiotics), one tablespoon of castor oil (known for promoting thickness), and crushed ginseng root powder—a staple ingredient in Korean scalp treatments that stimulates follicle activity.
Apply the mask directly to your scalp, not your hair lengths. Part your hair in sections to ensure complete coverage, and gently massage the mask into your scalp. Once applied, wrap your head in a warm, damp towel or use a shower cap. The warmth opens your pores and allows active ingredients to penetrate more deeply into your scalp tissue.
Leave the mask on for fifteen to twenty minutes. During this time, you might enhance the treatment further with steam therapy. Simply lean over a bowl of hot water with a towel draped over your head, or use a handheld facial steamer directed at your scalp. The steam therapy technique, borrowed from Japanese head spa traditions, maximizes ingredient absorption and provides a spa-like experience.
This nourishing phase addresses the specific imbalances you identified in Step 1, delivering targeted treatment while your scalp is most receptive.
Step 5: Seal and Balance with a Cool Rinse
The final step locks in all the benefits of your treatment while restoring your scalp’s natural pH balance. Rinse out your scalp mask thoroughly with lukewarm water, ensuring no residue remains. Then prepare your final rinse solution: one part apple cider vinegar to four parts cool water.
Pour this mixture slowly over your scalp, massaging it through with your fingers. Apple cider vinegar’s acidity (pH 4-5) perfectly matches your scalp’s natural pH level. This rinse closes hair cuticles that opened during the warm water washing, which adds immediate shine and smoothness. It also neutralizes any remaining product residue and balances your scalp’s microbiome.
The cool temperature serves an important purpose beyond pH balancing. Cold water constricts blood vessels, which helps “lock in” the increased circulation from your massage. This technique, used in Korean cold therapy treatments, also reduces inflammation and gives your scalp a refreshed, invigorated feeling.
After the vinegar rinse, do a final cool water rinse to remove the vinegar scent. Pat your hair dry gently with a microfiber towel—never rub vigorously, as this can damage your hair cuticles and irritate your freshly treated scalp. If possible, allow your hair to air dry completely rather than using heat styling tools.
Apply a lightweight, leave-in scalp tonic if desired. Look for products containing niacinamide, which helps regulate oil production, or peptides that support hair follicle health. Your scalp is now perfectly balanced, deeply cleansed, and primed for healthy hair growth.
How Often Should You Do a Scalp Detox?
The ideal frequency for at-home scalp detox treatments depends on your specific scalp condition and hair type. Those with oily scalp or significant product buildup benefit from weekly treatments. If you use styling products daily, work out frequently, or live in a humid or polluted environment, weekly detoxing prevents excessive accumulation.
For normal to dry scalp types, every two weeks provides sufficient maintenance without over-stripping natural oils. Over-exfoliating can disrupt your scalp’s protective barrier, leading to increased sensitivity and dryness. Pay attention to how your scalp responds—if you notice irritation or excessive dryness, reduce frequency.
People dealing with active scalp conditions like seborrheic dermatitis or severe dandruff may benefit from twice-weekly treatments initially, then tapering to weekly as symptoms improve. However, always consult a dermatologist for persistent scalp issues that don’t improve with home care.
Consistency matters more than frequency. A monthly treatment done religiously for six months yields better results than sporadic weekly treatments. Mark your scalp detox days on your calendar and treat them as non-negotiable self-care appointments.
Between full detox treatments, maintain scalp health with daily practices: massage your scalp for two minutes while shampooing, use a boar bristle brush to distribute natural oils, and avoid overwashing (which can trigger rebound oil production). These simple habits complement your intensive detox sessions.
Mistakes to Avoid During Your DIY Head Spa
Even with the best intentions, certain mistakes can reduce your treatment’s effectiveness or even damage your scalp. Never apply exfoliating scrubs to wet hair—they work best on dry scalp where they can properly break down buildup. Wet application dilutes the exfoliant and makes thorough scalp contact difficult.
Avoid using fingernails during massage or exfoliation. Your nails can scratch delicate scalp tissue, creating entry points for bacteria and causing inflammation. Always use the pads of your fingers in gentle, circular motions. Similarly, don’t massage too aggressively—more pressure doesn’t equal better results.
One common error is focusing only on hair strands while neglecting the scalp itself. Remember, this treatment targets your scalp primarily. Apply masks and treatments directly to your scalp skin, not just your hair. Your hair lengths can be treated separately with regular conditioning products.
Don’t skip the cool rinse finale. Hot water might feel more comfortable, but it strips away natural oils and leaves cuticles open, resulting in frizzy, dull hair. The temperature progression—warm for cleansing, cool for sealing—is intentional and crucial for optimal results.
Finally, resist the urge to use too many products. More isn’t better when it comes to scalp care. Stick to simple, natural ingredients rather than layering multiple commercial products that might contain conflicting active ingredients or cause buildup themselves.
Frequently Asked Questions
How soon will I see results from a DIY scalp detox?
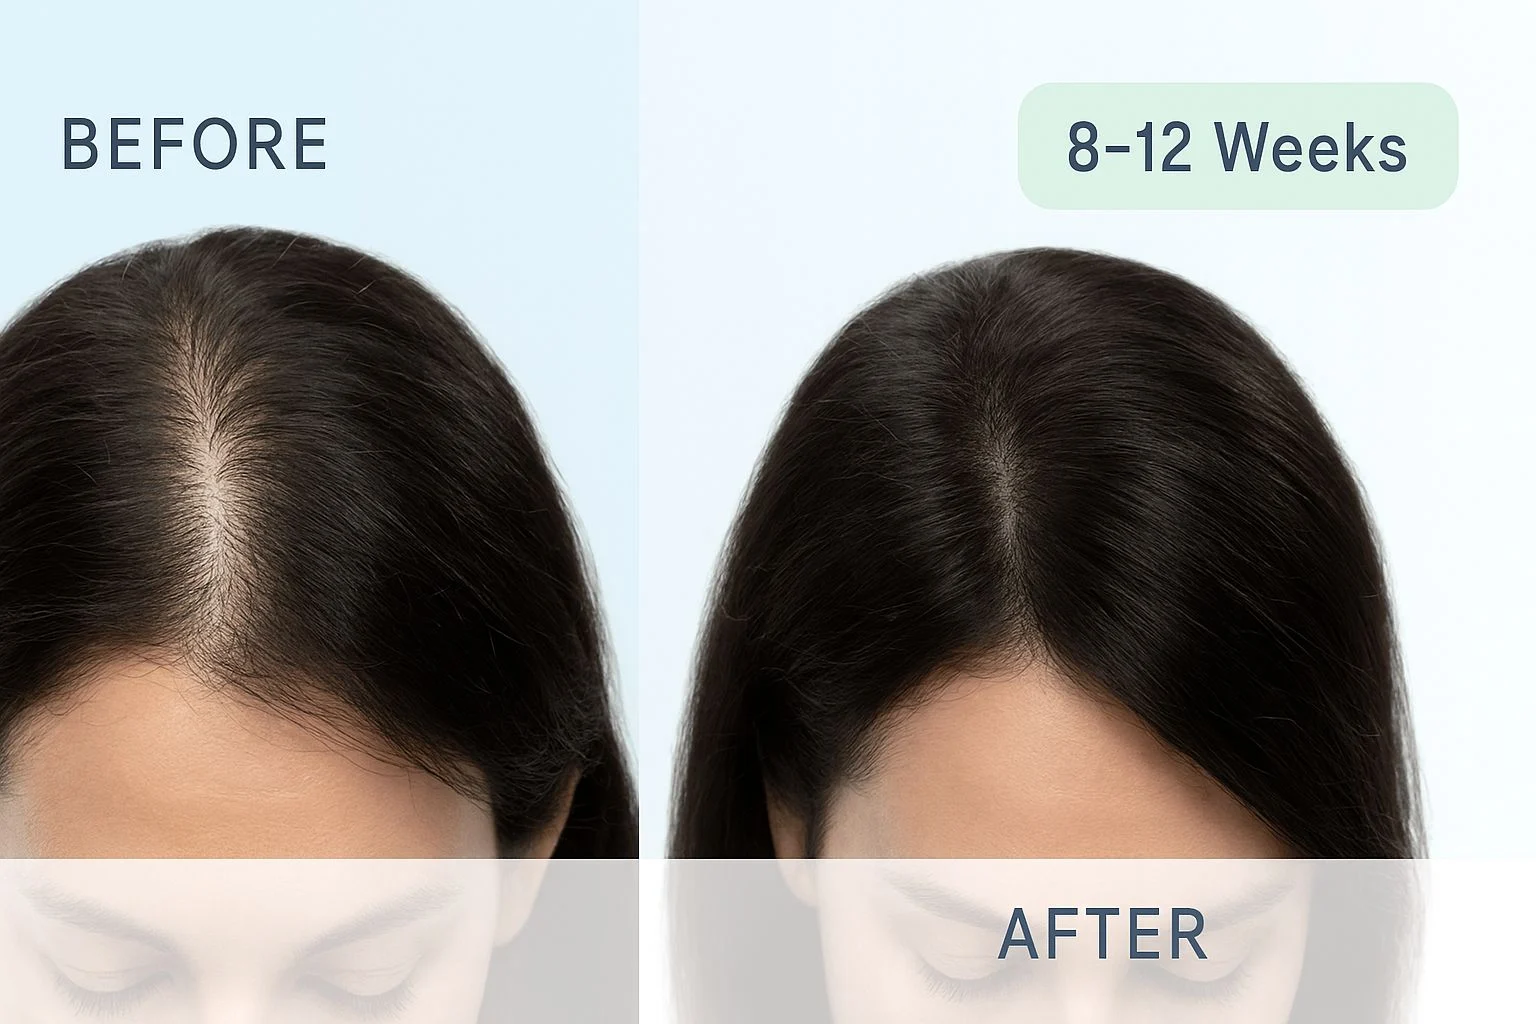
Most people notice immediate improvements in scalp comfort and hair texture after their first treatment. Your scalp will feel cleaner and less itchy, while your hair appears shinier and has more volume. However, significant changes in hair growth or thickness typically require consistent treatments over eight to twelve weeks, as this aligns with the natural hair growth cycle.
Can I do a scalp detox if I have color-treated hair?
Yes, but with modifications. Use a gentler exfoliant and avoid clarifying shampoos with sulfates, which can strip hair color. Replace the apple cider vinegar rinse with a color-safe pH-balancing conditioner. Scalp health is actually crucial for maintaining vibrant color, as a balanced scalp produces the right amount of oil to protect your color investment.
Is scalp exfoliation safe for sensitive or problematic scalps?
When done correctly with appropriate products, scalp exfoliation benefits even sensitive scalps. Use chemical exfoliants like salicylic acid in low concentrations instead of physical scrubs. Perform a patch test before applying any new ingredient to your entire scalp. If you have conditions like psoriasis or eczema, consult your dermatologist before beginning any new scalp treatment regimen.
What’s the difference between a DIY head spa and using regular shampoo?
Regular shampooing addresses surface-level cleansing of hair strands, while a comprehensive scalp detox penetrates deeper to remove follicle-clogging buildup, balance your scalp’s microbiome, and stimulate circulation for improved hair growth. Think of regular washing as daily skincare cleansing, while a head spa treatment is comparable to a monthly professional facial—both have their place in a complete routine.
Can men benefit from scalp detox treatments too?
Absolutely. Scalp health has no gender—men often experience buildup from styling products, sweat from exercise, and wearing hats regularly. Male pattern baldness and thinning can be slowed with improved scalp circulation and follicle health. Many men report that regular scalp treatments help their hair appear thicker and reduce the appearance of thinning areas by improving overall hair quality.
Transform Your Hair from the Roots Up
Your journey to healthier, more vibrant hair starts where your hair does—at the scalp. This five-step DIY head spa treatment empowers you to take control of your hair health without expensive salon visits. By dedicating just one hour every week or two to this scalp-focused routine, you’re investing in long-term hair vitality rather than just temporary cosmetic fixes.
Remember, healthy hair is a reflection of scalp health. When you address buildup, balance oil production, improve circulation, and nourish your follicles, you create the optimal environment for your hair to thrive naturally. The results speak for themselves: reduced hair fall, increased thickness, enhanced shine, and a comfortable, balanced scalp.
Start your first scalp detox treatment this weekend. Your hair—and your stressed mind—will thank you. Share your results in the comments below, and let us know which step made the biggest difference for you.